Did you find what you're looking for?
Smart Timer Setting Instructions
Setting up your Smart Plug App
- Locate the Smart Plug and Smart Plug Instructions that came packaged with your SuperCloset system.
- Using your smartphone or other smart device, point your camera at the QR Code shown here. This QR Code can also be found on the instructions in the box and the box itself.

- This will link you to the correct Smart Life application from your App store. Download the application to your device to continue.
- Once downloaded , open the application.
- Begin by tapping the “Sign Up” button.
- Start by entering your preferred email address. Then click “Get Verification Code.” A verification code will be sent your email inbox.
- Access your email inbox, then enter the code from the verification email into the App.
- Set your desired password.
- Select Notification preference (personal choice, will not effect usage)
- Set Location preference (personal choice, will not effect usage)
- Set Home Data preference (if have multiple plugs you may want to allow, but personal choice applies)
- Set the app to “Allow Bluetooth”
Adding a Smart Plug Device
- Select Add Device. You may choose to “auto scan” or “add manually”- This device is called the “Socket (Wi-Fi)”
- Once the device has been selected in the App, the App will prompt you to log into your home Wi-Fi network.
- Select your network, then enter your network password.
Note: This device is configured to operate on 2.4GHz, so your device will be looking for your 2.4 GHZ Wi-Fi Network. Most new routers are configured at 5GHz. If you are unfamiliar with your current router settings, please reach out to your provider for assistance then reattempt connection.
- The App will walk you through the following steps. As you go through the steps, please make sure to click “next” on the App to proceed to the next steps.
- Plug the Smart Plug into the desired wall outlet. Leave the socket powered off for 10 seconds then power it on by pressing power button on the side of the device. The indicator light should be red at this point.
- Confirm “next” in App.
- Now, Press and hold the power button for 5 seconds until the indicator light begins to blink.
- Confirm “next” in App, then check the box in the App to confirm the light is blinking.
- The device will now begin the connection process to the Wi-Fi network.
- Once complete you will see the “Device Added” screen. Click “done” to proceed.
- You can now turn on and off the Smart Plug from the App.
Now you can proceed to setting your Timer schedule for your Smart Plug.
Setting your Smart Plug Timer Schedule
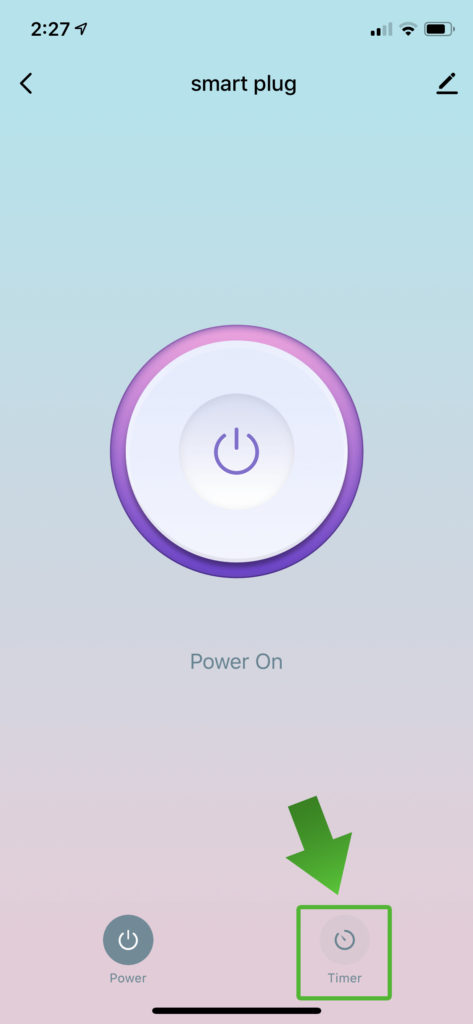
- Go to the Smart Plug power screen, Select “Timer” located at the bottom of the screen.
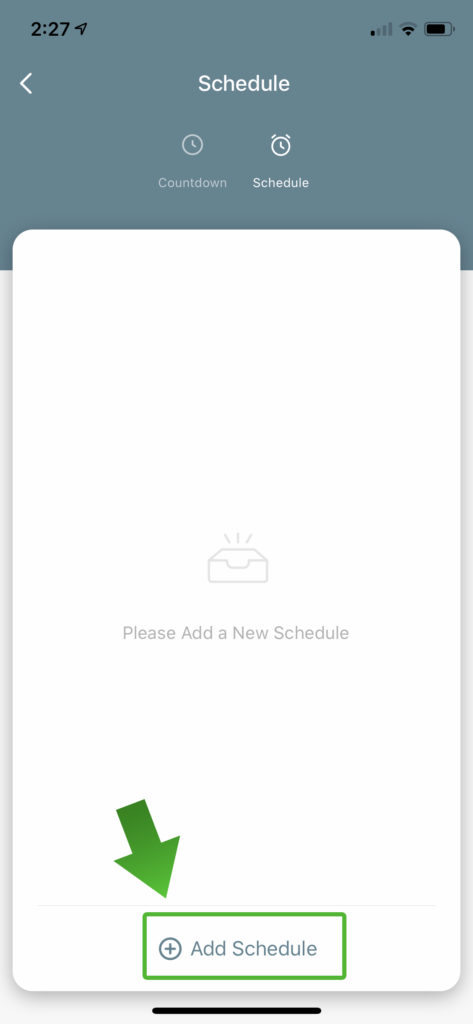
- On the Schedule Screen, select “Add Schedule” located at the bottom of the screen.
You are now going to set an “action” for the Smart Plug to perform, at a set time, on a set day(s). Let’s use the Vegetative Stage water schedule as our example for this process. For the first week of the vegetative stage, we want our top feed water pump to run for 2 mins, once per day.
- Select the days that you want this action to take place by clicking each day preferred. For the Vegetative Stage, we will select every day.
- Below the days, you can set the action. In this case, the “action” we want the Smart Plug to do is “turn on.” Set the action to “ON”
- Now lets set the time we want the action to take place. This can be personal preference but lets set the Smart Plug to perform its action at 12:00pm (noon)
- Once you have set the time, click “Save” in the upper right of the screen.
- You will be returned to the Schedule Screen. Here you will see the details of your first timer setting.
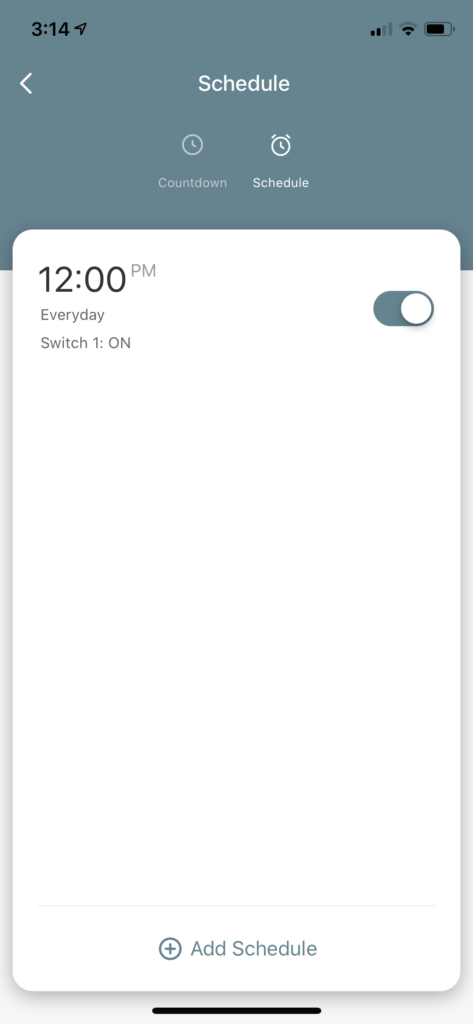
Your Smart Plug will now Turn ON – Every Day – at 12:00 pm
We are almost there. Now we need the timer to know when to turn “OFF” every day, otherwise it will stay on and overwater our plants. Let’s repeat this process, but this time we will tell our timer when to turn”off” every day.
- On the Schedule Screen, select “Add Schedule” located at the bottom of the screen.
- Select the days that you want this action to take place by clicking each day preferred. Since our Smart Plug will turn “on” every day, we also want it to turn “off” every day. Select every day.
- Below the days, you can set the action. In this case, the action we want the Smart Plug to do is turn “off.” Set the action to “OFF”
- Now let’s set the time we want the action to take place. We only want our water pump to run for 2 mins. Since we set the pump to turn on at 12:00pm, we will set our pump to turn off at 12:03pm.
- Once you have set the time, click “Save” in the upper right of the screen.
- You will be returned to the Schedule Screen. Here you will see the details for both of your timer settings.
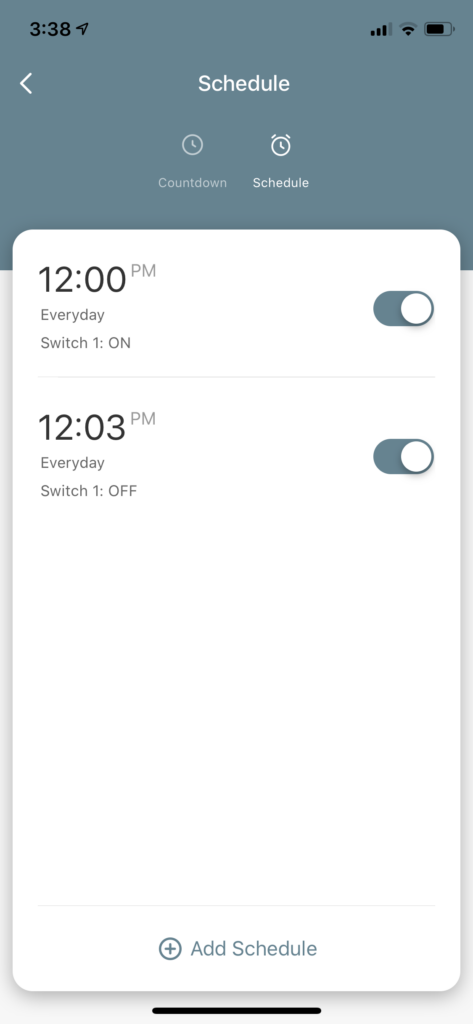
Your Smart Plug will now Turn “ON” – Every Day – at 12:00 pm – then – Turn “OFF” – Every Day – at 12:03 pm
Now that you have successfully added a schedule to your Smart Plug timer, you can click on the time to adjust your scheduled start and end times, or click “add schedule” to add more watering times per day.
SuperPonics suggested watering schedules
Below you will see the suggested watering schedules for the SuperPonics hydroponic systems. You are free to adjust these schedules as you see fit, based on your plants health and progress. It is always good practice to consult with a SuperCloset Grow Support Technician before making drastic changes to your watering schedule, as this will help you confirm the correct course of action. You can reach a SC Support Tech using the link below.
SuperPonic 8 / SuperPonic 16 / SuperPonic XL12
Week 1 of Vegetative Stage: Water for 2 mins – 1 time per day
Week 2-4 of Vegetative Stage: Water for 2 mins – 2 times per day
Flowering Stage: Water for 2 mins – 3 to 4 times per day (adjust as needed)
SuperFlow 20 / 26 / 32
Water for 15 min durations, every 1 to 3 hours (adjust as needed)
Note: When plants are first introduced to the SuperFlow system, monitor your rockwool (medium) for moisture content. If your medium is dry to the touch, use a cup or small container to top feed water from your reservoir on to the the plants base. This will coax the roots to grow downward towards and promote healthy growth. Once your roots are established you can rely on the ebb and flow of the water schedule to maintain your grow.
Still Need Help?
If you have more questions regarding this matter or if you require additional support,
open a case with our Grow Strong Support Technicians and we will reach out to you within 24 hours!